Installing a bathroom radiator is a task that can be done independently, provided that one has the right skills and tools. However, depending on the complexity of the installation, it may be necessary to use the services of a professional - especially if the work involves modifications to the plumbing or gas systems.
How to install a bathroom radiator? Learn the details by reading further.
When can you install a radiator on your own?
Let's start with the most important question, which is whether the radiator replacement can be done independently.
Replacing an existing radiator - if you plan to replace an old radiator with a new bathroom radiator of similar dimensions, you can usually do it yourself. However, this requires basic knowledge of plumbing systems and tools, such as pipe wrenches.
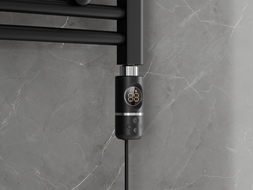
Installing an electric radiator - electric radiators are relatively easy to install since they do not require intervention in the existing central heating system. However, it is essential to ensure proper power supply and to install a thermostat.
When is it worth seeking professional help?
If you plan to install the radiator in a new location, this will require bringing new plumbing connections. Such work should be done by an experienced plumber.
Modification of existing plumbing systems
Any significant changes in the central heating installation, such as moving connection points or changing the type of radiator, should be carried out by professionals.
Do you need to report radiator installation?
Connecting the radiator requires obtaining a permit.
In the case of apartments in multi-family buildings or housing cooperatives, it is necessary to report all installation work to the manager or building administrator.
How to install a bathroom radiator step by step?
Replacing a bathroom radiator is a task that can be done independently if you have basic DIY skills and the right tools. Here is a detailed step-by-step guide on how to safely and effectively replace a radiator in your bathroom.
Tools and materials needed:
- New radiator;
- Pipe wrenches;
- Screwdriver;
- Cloths or towels;
- Bucket or basin for water;
- Sealant or Teflon tape.
Step 1: Turning off the water supply
Start by shutting off the water supply to the radiator.
Step 2: Draining water from the radiator
Place a bucket or basin under the radiator to collect the remaining water. Open the air vent on the radiator so that water can drain freely.
Step 3: Removing the old radiator
Once all the water has been drained, use a wrench to disconnect the radiator from the water supply pipes. Carefully loosen the connections, being mindful not to damage the pipes.
Carefully remove the old radiator from the wall. You may need to unscrew bolts or other mounting elements that support the radiator.
Step 4: Installing the new radiator
Prepare the new radiator for installation. If it is the same model, use the existing mounting hardware. If not, install the radiator brackets according to the manufacturer's instructions. Ensure that all connections are tight, using sealant or Teflon tape.
To learn about the best height to install a radiator, check our blog post.
Step 5: Connecting the new radiator
Connect the new radiator to the water supply pipes. Use pipe wrenches to tighten the connections. Again, pay attention to the tightness of the joints.
Step 6: Turning on the water and testing
Open the water valve and check carefully for any leaks at the connections. Bleed the new radiator to remove air, ensuring its effective operation.
Step 7: Verifying the radiator's operation
After installing and bleeding the radiator, turn on the heating and check if the radiator heats evenly without any leaks.
Connecting the radiator to the heating system - summary
Replacing a bathroom radiator is a technical task that can be done independently, provided one has the right tools and basic knowledge.
This process involves several key stages, starting from safely turning off the water supply, draining the existing water from the system, disconnecting the old radiator, and then installing and connecting the new radiator.
It is important that during radiator connection, every step is performed with great care.
When replacing a radiator, be sure to pay attention to the precision of the connections, using appropriate sealing materials like sealant or Teflon tape to ensure lasting tightness of the installation.
After completing the installation, it is essential to thoroughly check the system for any leaks and properly bleed the radiator.
Note!
We recommend using the services of a professional plumber. Professional installation not only ensures safety but also guarantees that the heating system will operate efficiently and reliably.

