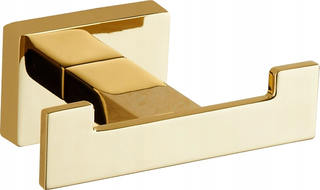
Hanging hooks on wall anchors is the basis for mounting all hanging elements on our walls, such as bathroom cabinets or various types of decorations. This skill will also prove useful when we want to renovate the bathroom and hang new wall cabinets in it. It is an extremely simple task. However, it is worth getting acquainted with all the tips to gain more knowledge on the subject and avoid making any mistakes.
Read the text below carefully, and you will definitely find the easiest solutions for yourself. You can do it yourself without using the services of companies that deal with interior decoration, thus saving money. However, remember that assembly is unlikely to proceed without proper tools - after all, hooks and similar fixtures need to be somehow placed in the wall, right?
Prepare a Complete Set of Necessary Tools for Assembly
If you have decided to refresh your bathroom by yourself and install new cabinets, prepare the tools that will help you perform all the tasks. Start by preparing a drill, which will be needed to create holes, a suitable drill bit, a hammer, a level, and a pencil. Also prepare the bathroom hooks and anchors you have chosen. Pliers, tweezers, or nails can also be helpful. It is best to have everything at hand so you don’t unnecessarily interrupt your work later.
Regardless of where on the wall we want to mount our cabinets or other elements, the first thing we need to do is select the right spot for the hole to mount the anchor. This step must be done very carefully so that later it doesn’t turn out that the hole is in the wrong place and the anchors on our wall are spaced differently than the brackets on the cabinets. It is best to do this by marking the spot for the first hole under the anchor with a pencil on the wall. Then you need to measure the spacing of the brackets on the cabinet and transfer this value to the wall. At that point, we will mark the spot for the second hole under the anchor. Both holes for the anchors should be drilled very carefully and level. This determines whether the cabinet will hang straight or not.
If you have everything accurately measured, we can start drilling. However, much depends on the type of our wall. A plastered wall will be less problematic than one with tiles. It’s enough to choose the right drill bit and drill each hole for the anchor one by one. It is advisable to make a small indentation on the wall surface beforehand to facilitate your work. We can do this by placing a nail against the wall and lightly tapping it with a hammer to create a slight indentation.
Be especially careful when drilling ceramic tiles! It’s a difficult skill - to drill a hole so that the tile does not crack, so if you are not a specialist in home repairs - look for a professional, as it’s better to spend some money on a well-done assembly service than to lay new tiles in the bathroom.
Choosing the Right Drill Bit for Installation is Key to Success
When starting to drill, we should pay attention to ensure that the drill bit is not too large in the initial phase. If we decide to drill holes for anchors, we risk the plaster starting to crumble and detach from the wall. The hole, in turn, may turn out to be too large for our anchors. Therefore, it’s best to drill in the designated area first with a smaller drill bit, and only once we break through the plaster to use the correctly sized drill bit. When redrilling with the drill bit that matches the anchors, you may also extract some of the drilled material from the wall. If you don’t do this, you may encounter resistance when driving the anchor in. In that case, the obstacle in the form of the drilled material will prevent you from driving it all the way in.
We can drill while holding the drill in our hands or using various products that will help us maintain its stability. For example, a stand can be helpful. Thanks to it, work with the drill is fully controlled. Using a stand minimizes the risk of damaging the drill bit, even breaking it when tackling difficult tasks. Therefore, such products are used by both DIY amateurs and professionals. Whether we have a stand or not, it is obvious that throughout the drilling process we must keep the drill perfectly perpendicular to the wall and try not to move it in any direction other than specified.
What to Do When the Holes Are Already Properly Drilled?
If everything has gone well up to this point, you should start the proper part of your work, that is, proceed to secure the anchors in the holes.
- Take the prepared anchors and insert them into the obtained holes. Don’t worry if they enter with slight resistance, as that is how it should be. If this presents too much of a problem, you can tap them in with a hammer to the appropriate depth.
- Once you have successfully installed the anchors, there is nothing left to do but connect the remaining elements with them. Hooks for anchors can be easily screwed into the anchors using pliers, tweezers, or a small wrench.
- If you think this is too difficult a task, you can search on your mobile device or computer for popular websites that offer such services and contact them. You will definitely find the best solution together.

