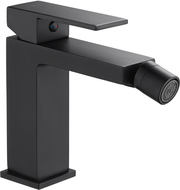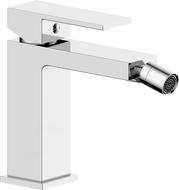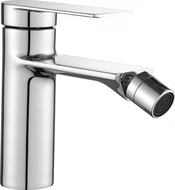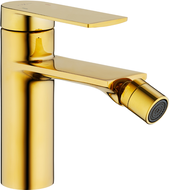
Undoubtedly, the times when nobody thought about installing a bidet faucet in the bathroom are slowly becoming a thing of the past. A bidet significantly influences the comfort of using the bathroom. However, to make using the bidet as simple and intuitive as possible, it must be installed correctly. Its installation largely resembles that of wall-mounted sinks. Before the entire process, from the very first moment, one should consider where to place the chosen bidet and at what height the bidet faucet should be installed. If it is located in close proximity to the toilet bowl or somewhat further away, certain rules must be followed. Read further in this article to learn more about them.
Proper Distance – Bidet Faucet
The proper distance is primarily the distance from the wall and the toilet bowl. It should be about 30 cm, as too close proximity to other fixtures will be problematic. Additionally, there should be a space in front of the bidet that allows for comfortable use - this should be about 70 cm. The appropriate amount of space for the bidet is associated with great user comfort. The toilet bowl of the bidet should be at a proper height, which is about 40 cm above the floor. This way, usage will be as comfortable as possible, even in a small bathroom. However, in this case, a bidetta, which is a functional bidet shower placed next to the toilet, may also prove useful. The water stream is directed directly to the bowl.
The bowl has cutouts for the plumbing installation and also a special place for the siphon. It is easiest to mount wall-hung bidets on frames that are located behind the plaster. Such models specifically designed for bidet installation have a short handle. Bidets with a track-mounted installation will require necessary tools such as a level, drill, expansion screws, tracks, and installation elements. Bidet manufacturers often provide a mounting kit that includes plastic fittings, Allen keys, a file, screws, caps, and a flat wrench.
A measuring tape will be useful for measuring the length of the pipes; sharp edges can be removed with a file. The screws located in the frame are used to secure the dowels. Then, the plastic fittings can be inserted into the openings in the bidet. Next, Allen screws should be tightened using a wrench. Now, an important part. The place where the drainage pipes connect to the bidet and the frame should be greased with a special insulating and sealing paste. On the frame mounted on the wall in the built-in frame behind the plaster, installation screws should be applied. A moment before this action, the drainage pipe should be pressed in tightly.
Bidet Faucet - Handle with Care
It is very important not to force anything. The fittings should be tightened with appropriate sensitivity; otherwise, they can easily be damaged, as can the bidet itself. The situation is different for freestanding bidets. The ceramic should be pressed against the wall. The entire process starts with preparing the pipes in the wall. They should be mounted to the plumbing connections. The standing bidet faucet should adhere to the ceramic surface.
Next, the bidet can be connected to the water supply. This can be done using flexible hoses. The last step will be to connect to the sewage outlet. Of course, this instruction may vary across different models. It is always advisable to read the operating manual of the specific manufacturer carefully or hire a specialist for the bidet installation; otherwise, it will be easy to damage such ceramic or install it incorrectly.
The installation of the bidet frame, just like with the toilet bowl, is best covered with drywall. In the case of a freestanding bidet, the ceramic should be secured to the substrate using special, durable screws. The water supply and sewage connections should be compatible with the manufacturer's guidelines. In this case, it is advisable to entrust this work to a specialist, especially for amateurs who are performing this task for the first time.
Faucet Installation – Steps
- The installation of the sink faucet should begin with shutting off the water supply to the faucet. This is done by turning off the shut-off valves, and then it is advisable to check if the task has been done correctly. To do this, the hot and cold water taps in the sink are turned on.
- At this moment, any remaining water trapped in the hoses should flow out.
- Next, the hoses of the old faucet can be unscrewed. Using a flat wrench, remove the screws holding the old faucet.
- New connection hoses that will be responsible for bringing water should be screwed into the body of the new faucet. It is important to ensure that there are gaskets at the end of these hoses.
- Next, the screws with threads should be found in the new faucet to effectively secure it to the substrate.
- Now, it can be placed in the sink.
- A rubber gasket is placed between the sink and the securing screws, followed by a metal one. This way, even with intensive use of the faucet, it will not affect the aesthetic appearance of the sink. Moreover, the tightness and stability of the faucet will be greater.
- Next, the hose is connected to the faucet connection and the input of the water from the sink.
- At this point, the valves can be opened.

