


A suspended ceiling is a solution most commonly used to lower a space that is too high. This helps restore the proper proportions of the interior. However, a suspended ceiling is not only a decorative issue; it is also a solution that allows for soundproofing, insulating the space, and reducing the amount of heat energy needed for heating. A smaller volume heats up faster, and an additional layer prevents heat from escaping through the ceiling. What other advantages does a suspended ceiling have, and is it worth deciding on this solution?
How to Get Started with Suspended Ceilings?
Installing a suspended ceiling is quite a labor-intensive task, which does not mean that it cannot be done independently. However, before you decide to do a suspended ceiling by yourself, familiarize yourself with the instructions that you can find online. You will find hints on how to install such a ceiling step by step. First, you need to equip yourself with the necessary materials to install the suspended ceiling. The ceiling will be made using drywall panels, so you need to measure exactly how many panels you will need to purchase. In addition to drywall panels, you will primarily need:
-
wall profiles,
-
main profiles,
-
load-bearing profiles,
-
electrical wires,
-
mineral wool,
-
filling compound.
Additionally, for the finish, a decorative element in the form of LED strips and elements necessary for the installation of spotlights or even gypsum or styropor decoration may be useful.
How to Start with a Suspended Ceiling?
Before starting the installation of a suspended ceiling, a decision must be made on whether it will be a ceiling made of gypsum boards or tiles; the latter is somewhat less labor-intensive. However, most often, a suspended ceiling made of drywall is installed because it can also be insulated with mineral wool. The first stage will be to plan the layout of the panels. Gypsum boards come in different sizes, and it is best to lay them out in a way that minimizes the gaps requiring finishing.
Next, you need to plan the installation of so-called hangers, which are the mounting points for the individual panels. This involves marking the points for securing the load-bearing profiles, which are also the main profiles. They are most often run along the length of the room, with a distance of about one meter between them. It should be remembered that they cannot be further than 40 cm from the wall. Hangers are installed along the main profiles at a distance of up to 90 cm, keeping the distance from the walls at a maximum of 40 cm. You can mark the appropriate places on the ceiling using a laser pointer.
Installation of the Suspended Ceiling, Next Steps
Properly securing the suspended ceiling ensures its durability and safety, so metal anchors are usually used for its installation. Plastic anchors are not recommended for truly heavy loads. After planning the location of the hangers, you need to determine the height at which the ceiling will be suspended. It is usually set at least 10 cm below the existing ceiling surface. The height is marked around the entire room, and then wall profiles are fixed along the marked line.
Using drywall panels, UD profiles are installed along the wall at intervals of about 60 cm. It is not necessary to join the ends of the individual profiles precisely; small gaps can be left between them. Next, we proceed to assemble the frame for the drywall panels. This involves leveling the outer fastening profiles (CD) and adjusting the layout of the main profiles (also CD) to them. The main profiles are fixed to the hangers and lowered onto the fastening profiles installed in the wall profiles. Remember to maintain a distance of the first profile, a maximum of 15 cm from the wall.
How to Make a Suspended Ceiling, Further Stages
The next stage of installing the suspended ceiling will be placing the entire framework that will support it. Using special snap connectors, we sequentially connect the main profiles with the load-bearing ones. The individual fastening profiles are inserted into the wall profiles at a distance of 50 cm from the previous one, and the action is repeated until the entire framework of the suspended ceiling is laid.
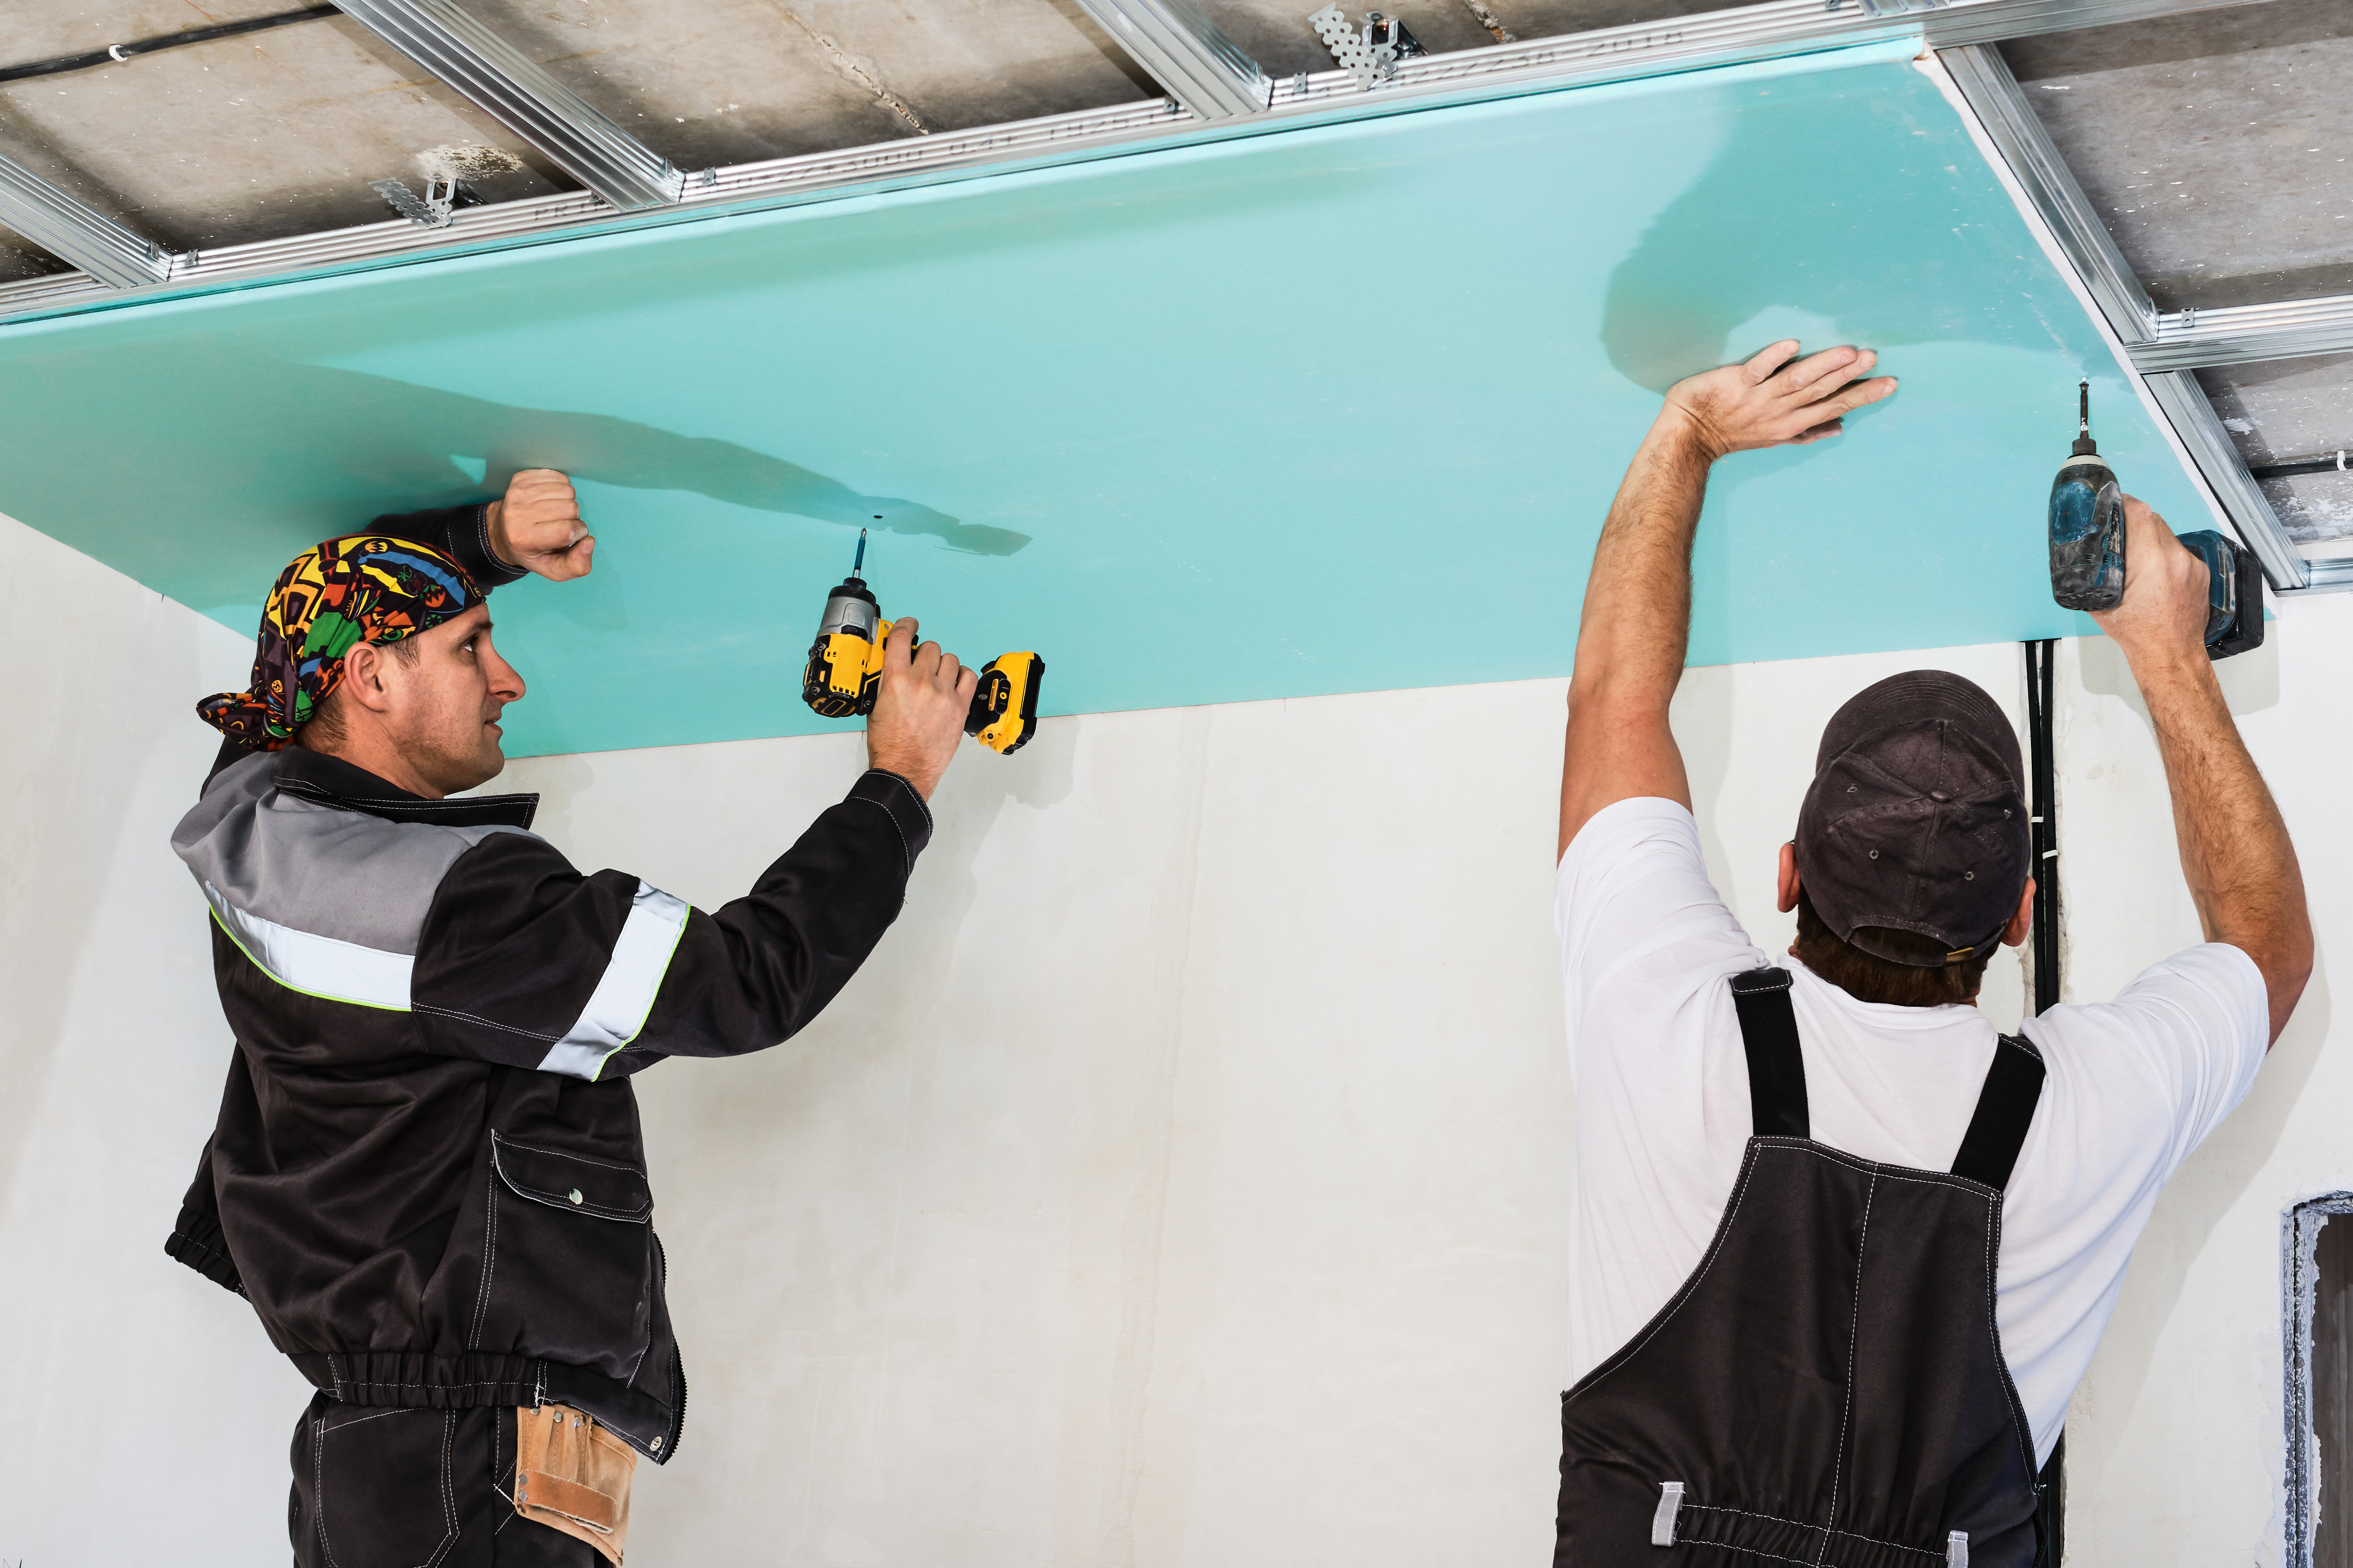
Now the work begins, which can be difficult to perform alone. To suspend the ceiling, full-size drywall panels should be secured with the help of another person. A makeshift ramp can also be helpful to support the panel while fastening it to the individual profiles. You should ensure that the panel is positioned with its longer side perpendicular to the fastening profiles, also keeping in mind that the joints of the individual panels should be located at the center of the wall and load-bearing profiles.
Installation of the Suspended Ceiling, Further Steps
The next necessary step to create a suspended ceiling is securing the panels to the framework. Self-drilling screws of 25 mm in length are usually used for this purpose along with a screwdriver, which significantly expedites the installation process of the suspended ceiling. Screws are spaced every 20 cm along the line marking the center of the profile. At the edges, the distance should be about 1.5 cm from the edge. At this time, any insulation is also placed, most often in the form of mineral wool.
The screws should be sunk into the panel at least 1 mm deep. Thus secured panels require final finishing, namely filling the joints and all connections, and filling the gaps between the drywall panels and the walls. The final stage is to impregnate and paint the panels in the selected color.
Suspending the Ceiling and Installing Lighting
Before suspending the ceiling, it is necessary to plan the appropriate electrical installation, and this should be done at the latest during the installation of the framework. The layout and connection of the individual electrical wires are very important because after the ceiling has been suspended, it is essentially impossible to access the space above without damaging it. If you plan to hang heavy lamps, you must ensure access to the ceiling where appropriate brackets will be mounted. If, on the other hand, you choose spotlights, they can be recessed directly into the ceiling surface.
It is most convenient to commission the installation of a suspended ceiling to professionals; however, with a sufficient amount of determination and the necessary accessories, you can attempt to do it step by step on your own.