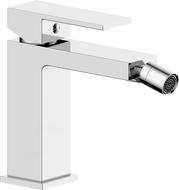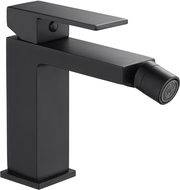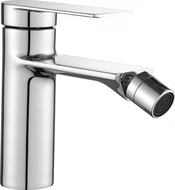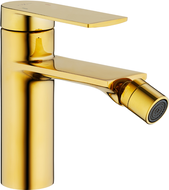
Undoubtedly, the days when installing a bidet tap in the bathroom was not even considered are slowly becoming a thing of the past. A bidet significantly enhances the comfort of using the bathroom. However, for the bidet to be as easy and intuitive as possible to use, it must be correctly installed. Its installation largely resembles that of wall-mounted basins. From the very start of the process, you should consider where to place the chosen bidet and at what height the bidet tap should be installed. If it is located close to the toilet bowl or a bit further away, several rules must be followed. Read on to learn more.
Appropriate Distance – Bidet Tap
The appropriate distance is mainly the distance from the wall and the toilet bowl. It should be about 30 cm, as having it too close to other equipment will be problematic. Additionally, there should be space in front of the bidet allowing for comfortable use - this should be about 70 cm. An appropriate amount of space for the bidet is associated with great user comfort. The bidet bowl should be at an appropriate height, that is, about 40 cm above the floor. This way, usage will be as comfortable as possible, even in a small bathroom. However, in this case, a bidetta, a functional shower head, can also work well, directing the water stream directly into the bowl.
The bowl has cutouts for plumbing installation and a special place for a siphon. Wall-mounted bidets on under-plaster frames are the easiest to assemble. Such models specifically intended for bidet installation have a short handle. Wall-mounted bidets with rail mounting technology will require the necessary tools, such as a spirit level, drill, expansion screws, rails, and installation elements. Bidet manufacturers often include a mounting kit, which includes plastic mounts, hex keys, a file, screws, caps, and a spanner.
A measuring tape is used to measure pipe lengths, sharp edges can be removed with a file. The screws in the frame serve to secure the pins. Then, plastic mounts can be placed in the holes in the bidet. Next, tighten the set screws using a key. Now, the important part. The place where the drain pipes, bidet, and frame connect should be smeared with a special insulating and sealing paste. The skeleton mounted on the wall in the under-plaster frame should be placed on the mounting screws. Just before this step, be sure to precisely push in the water drain pipe.
Bidet Tap - Be Careful with It
It's very important not to force anything. The mounts should be pressed with care; otherwise, it's easy to damage them and the bidet itself. It's a different case with mounting a freestanding bidet. The ceramic should be pressed against the wall. The entire process starts with preparing the pipes in the wall. They should be mounted on the water supply fittings. The standing bidet tap should fit snugly against the ceramic surface.
Then you can already connect the bidet to the fittings. This can be done using flexible hoses. The final step is connecting to the drainage hole. Of course, this instruction may differ between models. It's always worth reading the user manual of the specific manufacturer or hiring a suitable specialist for the bidet installation; otherwise, it's easy to damage such ceramics or install them improperly.
The frame installation for the bidet, just like the toilet bowl, is best enclosed with G-K boards. For a freestanding bidet, the ceramic should be attached to the floor using special, durable screws. The water and drainage connections should be compatible with the manufacturer's guidelines. In this case, it is advisable to entrust this task to a specialist, especially for amateurs doing this activity for the first time.
Basin Tap – Installation
- The installation of the basin tap should start by shutting off the water supply to the tap. This is done by turning off the stop valves, then it's worth ensuring the task is done correctly. To do this, turn on the hot and cold water taps in the faucet.
- At this point, any remaining water in the hoses should drain out.
- Then, you can already unscrew the hoses of the old tap. Use an open-end wrench to remove the screws holding the old tap.
- New connection hoses should be screwed into the body of the new tap, which will be responsible for the water supply. It is important to ensure that there are gaskets at the ends.
- Next, the mounting screws with threads should be in the new tap so that it can be successfully attached to the surface.
- Now it can be placed in the basin.
- A rubber gasket is placed between the basin and the mounting screws, then a metal one. This way, even with intensive use of the tap, it will not affect the aesthetic appearance of the basin. Moreover, the tightness and stability of the tap will be greater.
- Then the hose is connected to the tap fitting and the water inflow from the washbasin bowl is connected.
- At this point, the valves can already be opened.

