


Waterproofing the bathroom is very important. It protects the room from moisture in key areas, such as spaces between tiles, corners and installations passages. It is necessary to perform it correctly if you want to limit the growth of fungi and mold, as well as the negative impact of water on the building structure. The problem is often visible after just a few months of bathroom use, so it is worth being aware of the mistakes that lead to this situation.
What will you learn from this article?
Waterproofing is one of the most important finishing tasks during a bathroom renovation. It prevents the growth of mold, fungi, as well as flooding lower levels of the building. In this article, you'll find answers to questions:
- Why does properly executed waterproofing affect the durability of the building?
- When does bathroom waterproofing need improvement?
- How to plan waterproofing works?
Why is it necessary to waterproof the bathroom?
Waterproofing is otherwise a sealing layer under the tiles, thanks to which water does not penetrate into the lower structural layers of the building. It is necessary to perform it primarily in the bathroom, which is particularly exposed to moisture and regular water action.
Tiles and grouts laid on floors and walls in the bathroom do not create a tight layer, and the grout mass gradually washes away. This causes water to penetrate the substrate, which over time causes structural degradation.
- The first signal that something is wrong in the bathroom is the darkening of grouts, the appearance of seepages in corners, and also a musty smell in the room.
- Then, fungi and mold will appear in the corners of the bathroom and on the surfaces of tiles.
- A dangerous situation occurs when the tiles start to detach from the substrate, and then cracks appear in the plaster. In the worst case, the entire floor will be damaged. Then you will face a major bathroom renovation, along with laying tiles anew.
Without waterproofing on the floor, there is no barrier that prevents moisture from penetrating to lower floors. In case of a washing machine breakdown, a leaking shower tray siphon or a leak at the faucet, you will flood the neighbor below. It is better to perform bathroom waterproofing than to bear the cost of repairing someone else's apartment.
What is the best bathroom waterproofing?
You have many waterproofing solutions to choose from. Below we present the most popular, most commonly used in bathrooms.
Sealing mat
A durable, flexible membrane used in areas particularly exposed to water action, i.e., on the floors and walls of shower cabins. It strengthens the waterproofing system and provides additional protection for surfaces. It is a good idea to combine it with liquid foil. You will minimize the risk of leaks.
Liquid foil
An elastic sealing material that works perfectly in bathrooms, kitchens, but also on terraces. Apply the first layer using a roller or brush. A waterproof layer is created that limits the harmful effects of moisture. Liquid foil can be used on both floors and walls. It is worth applying it in the shower cabin and around bathtubs.
Sealing tape
This material increases the tightness of floor-to-wall joints and also corners. It is elastic, therefore it strengthens the protection of the most important points in the bathroom, through which water can penetrate the substrate.
How to carry out the waterproofing process step by step by yourself?
It is worth performing waterproofing on the entire surface of the bathroom, but with special attention to wet zones exposed to direct water action. Before laying tiles, perform moisture protection using special preparations.
- Waterproofing on the entire floor surface — follow the manufacturer's instructions for the chosen sealing material. Remember to turn the sealing layer at least 15 cm onto the wall.
- Waterproofing in the shower area — it is best to perform sealing at a height of at least 20 cm from the floor.
- Waterproofing around the bathtub and sink — use additional seals on the floor and a strip of the wall about 20-50 cm high around the bathroom ceramics.
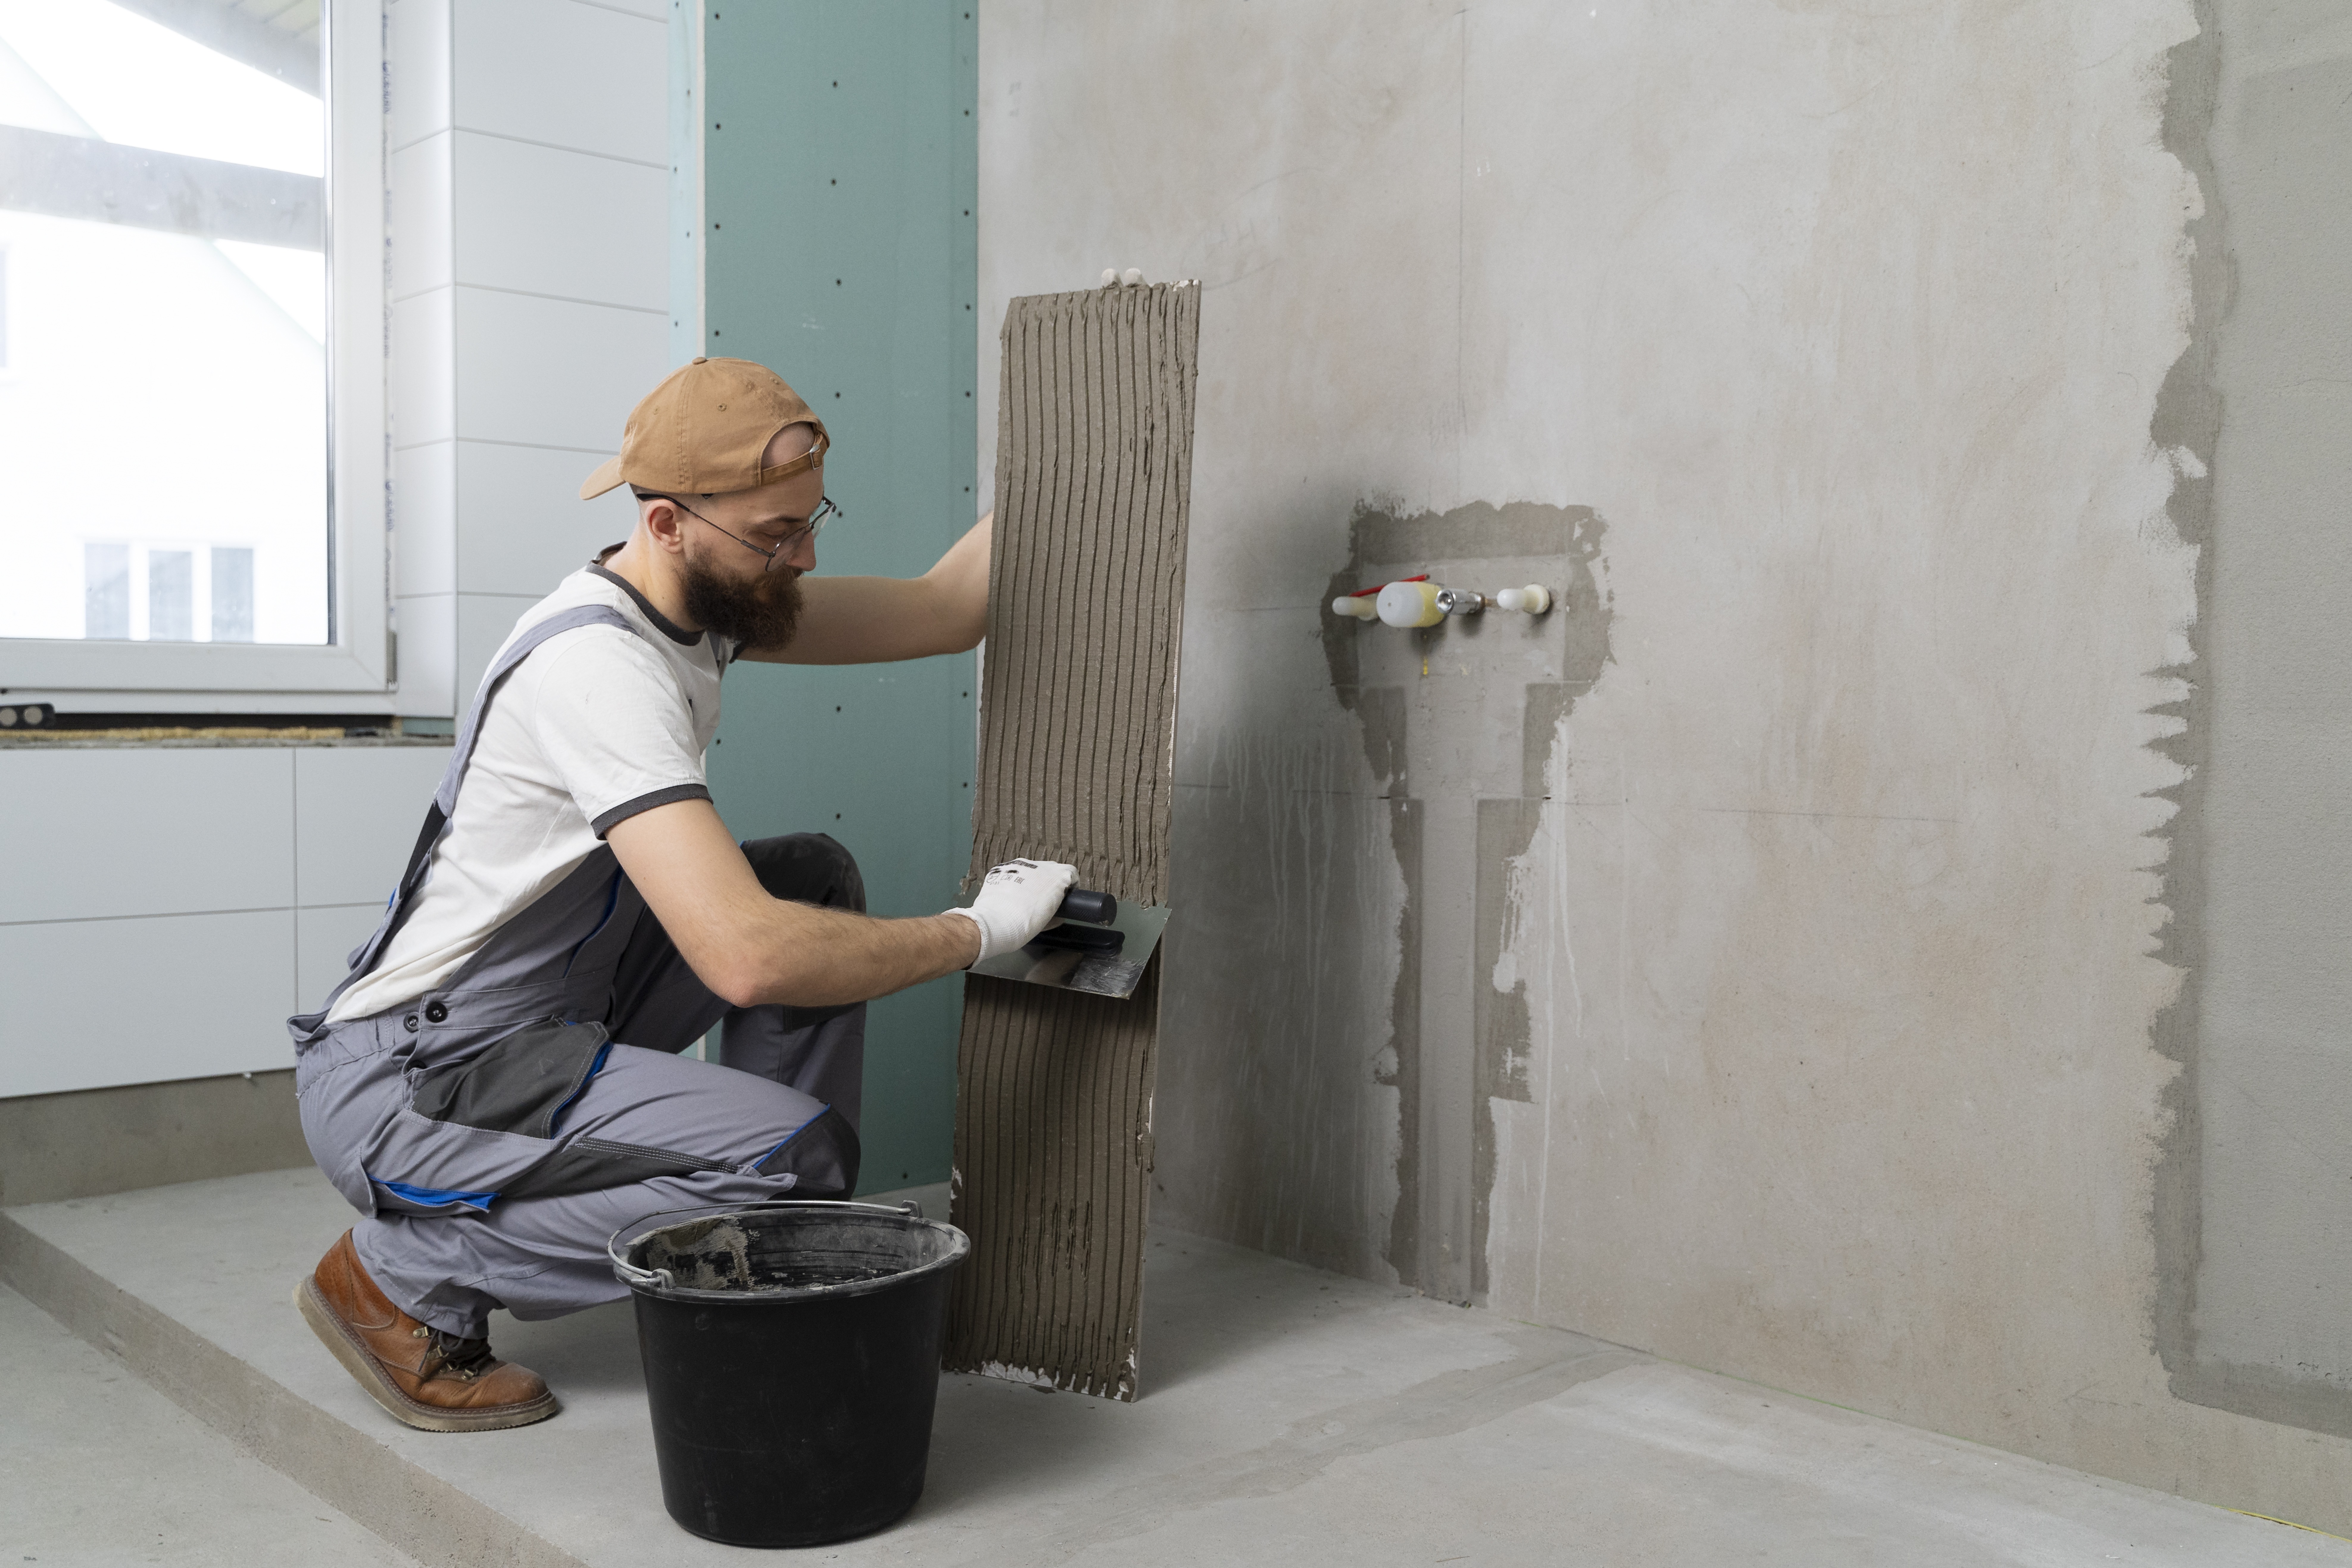
1. Preparing the substrate
Waterproofing can only be applied to a dry, clean, and even substrate. Fill in gaps and prime the substrate. Deep penetrating primer increases the adhesion of waterproofing layers.
2. Installing sealing tape
Secure the connections of the walls with the floor with sealing tape before applying liquid foil throughout the room. It is important to pay attention to internal and external corners, drains and installation passages, i.e., places where water can penetrate the lower layers of the building.
3. Applying liquid foil
To ensure the effectiveness of bathroom waterproofing, use a roller or brush to apply 2 or 3 layers of liquid foil. Do not work on a wet substrate, so wait from a few to several hours for the first layer to dry before applying the next one.
4. Waterproofing walls and floors in wet zones
On floors and walls in the shower cabin and around the bathtub, apply additional seals. On liquid foil, you can apply waterproofing mats that increase protection in moist zones.
5. Sealing installation passages and joints
Pay special attention to places where the plumbing passes through walls and floors. Use sealing cuffs and an additional layer of liquid foil to secure them. This will increase protection of the surface from water and moisture.
Check how to renovate the bathroom step by step.
Most common mistakes when waterproofing a bathroom
If the waterproofing throughout the bathroom is done incorrectly, you will face an expensive renovation. Problems with leaks and mold will arise very quickly. Most mistakes are made during substrate preparation and also by overlooking strategic places, such as corners in the shower cabin.
- Incorrect substrate preparation — remnants of tile adhesive class C2TE/S1, dust, and unevenness prevent proper adhesion of the waterproofing layer. Over time, detachments and leaks will appear. Before starting to seal, ensure proper surface preparation. Do not skip priming.
- Incorrect thickness of the waterproofing layer — each waterproofing layer should have a thickness specified by the manufacturer. Using too little material or skipping the application of the second layer reduces the effectiveness of the sealing mortar and liquid foil.
- Lack of continuity of insulation in corners and other important places — waterproofing should include the use of sealing tapes and wall and floor cuffs in corners, around the bathtub and shower tray, and also at installation passages. If they are missing, over time, water and moisture will begin to penetrate the lower layers of the building.
- The use of inappropriate materials for waterproofing — not every sealing product is intended for use in a bathroom. Check the manufacturer's recommendations before using it. Avoid cheaper substitutes for liquid foil. They do not effectively protect wet areas from moisture. It is very important to use high-quality insulation in the bathroom. This is an investment for many years.
That's why it's worth investing in high-quality bathroom waterproofing
Poorly executed waterproofing will reveal itself in the bathroom very quickly. Moisture that gets under the tiles will cause the development of fungi and mold both in the bathroom and on lower floors. A musty smell will linger in the room.
In the long term, in wet rooms, tiles on the walls and floors will start to fall off, and this will require a very costly renovation.
Waterproofing a bathroom with high-quality products creates an effective protective barrier and helps to avoid many unnecessary problems.